A Spring Tea Birthday Party!

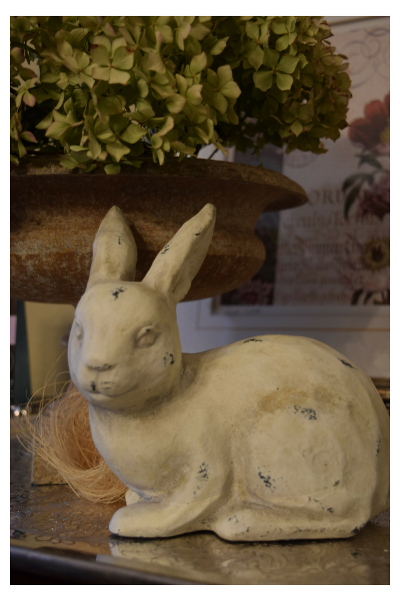
I made a little spring display on a silver tray with this cute rabbit, straw nest, and aged metal urn filled with dried green hydrangeas.  A large botanical print was used as the background.

I made a little spring display on a silver tray with this cute rabbit, straw nest, and aged metal urn filled with dried green hydrangeas.  A large botanical print was used as the background.

This month I had the opportunity to host a spring tea for my friends from college. Two of our friend's were having their birthdays.  I decided to create a table setting with a botanical, garden theme in honor of spring time.  I used a collection of tea cups that I had on hand. Some passed down from my grandmother, and others given as gifts from friends or family over the years.  

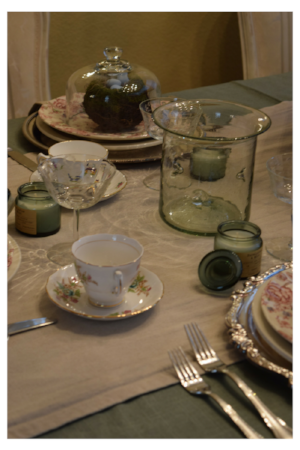
Here are the first few layers of the table setting.  The glass candle holders and candles I purchased from world market.

Here are the first few layers of the table setting.  The glass candle holders and candles I purchased from world market.

I started with a basic gathered layered linen table skirt which drops to the floor.  I went out looking for a table cloth, but couldn't find the color I was looking for.  As a result, I ended up creating my own table topper with a fabric scrap of blue/green linen that already had two nice salvaged edges.  I clipped the other edges and frayed them to make the sides consistent and layered it over the table skirt.

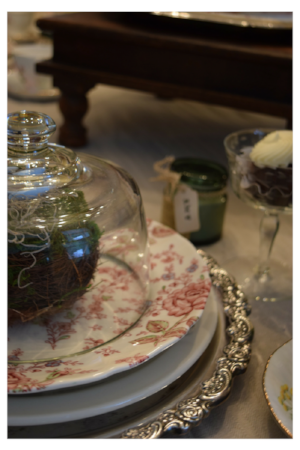
Close-up of the layered place settings.

Close-up of the layered place settings.

Next, I topped that fabric remnant with another table runner also in a neutral linen colored fabric.  After the runner was in place, I pulled out some silver trays that I had in my cupboard.  After polishing them, I placed them down as chargers for my place setting.  Next, I placed a cream dinner plate followed by a floral chintz salad plate to create a layered look.  To bring the garden feeling in I topped the salad plates with little birds nests filled with blue speckled caramel eggs and placed cheese dome lids over the top of them.  

Bird nests with caramel speckled eggs.

Bird nests with caramel speckled eggs.

In front of my place settings, some recycled glass candles (purchased from World Market), because I loved the color.  These candles went well with my table linens and china.  With some vintage lace trim, I wrapped each candle with a bow and a tea stained stamped tag with each guests name.  I also added vintage etched champagne glasses filled with mini Bundt cakes.

The candles tied with vintage lace and tea stained stamped name tags.

The candles tied with vintage lace and tea stained stamped name tags.

In the center of my table for height, I used an old wooden cheese board where I placed my teapot, and creamer.  I purchased two more larger recycled glass candle holders which I used to hold two floral arrangements that I created from store purchased flower bouquets.  The colors matched the china perfectly and added to the feeling of spring.  I also clipped my newly budding plum tree of some of its branches and filled them in a large glass vintage pickle jar that I had in my cupboard. I set the jar inside an opening in my French armoire for added drama.  

Here are the floral arrangements from above.  I loved the colors, and they were a perfect match to the chintz china.

Here are the floral arrangements from above.  I loved the colors, and they were a perfect match to the chintz china.

Flowering plum tree bouquet in recycled glass pickle jar.

Flowering plum tree bouquet in recycled glass pickle jar.

Finally, I purchased little brown bags from the dollar tree.  I used pieces of the same linen fabric and the same vintage lace and tied it in knots around the bag handles.  I used the lace to attach seed packets also from the dollar store to the bags.  The goody bags were used for guests to take home their candles and extra treats.  

The goody bags with forget me not seed packets.

The goody bags with forget me not seed packets.

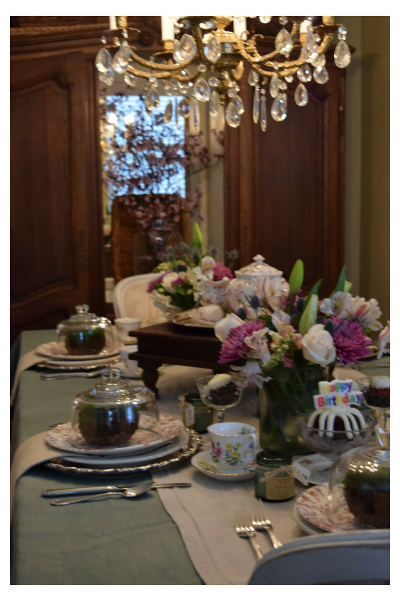
View of the table set and ready for guests.

View of the table set and ready for guests.

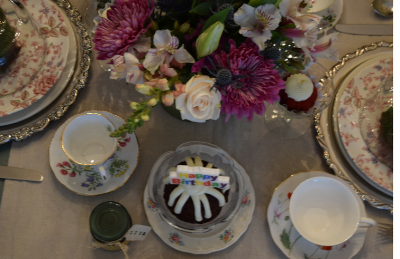
Table from up above.

Table from up above.

One last pic of everyone enjoying the table.

One last pic of everyone enjoying the table.

Take care,

Christina

A Baker's Rack Makeover

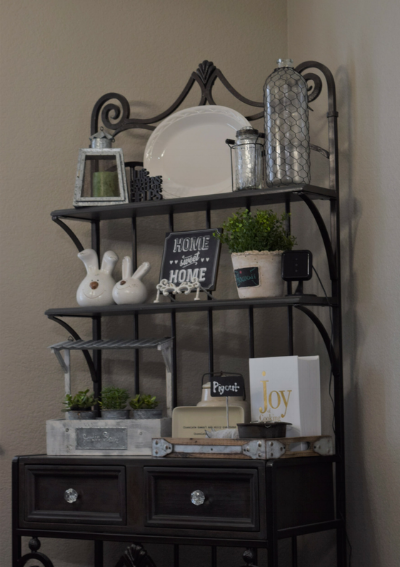
The new baker's rack.

The new baker's rack.

This week I thought I would share a makeover of my client's baker's rack.  In her breakfast nook, she had a baker's rack that she loved.  It also fit her space well.  There was just one problem.  The wood shelves were an orange oak colored stain.  In her now newly renovated gray/beige kitchen, the orange oak color wasn't the look she wanted.  I suggested that we strip the shelves of the old stain and re-stain them in her new color palette.  She loved the idea, and now it compliments her new design perfectly.  Check out these before photos of the orange oak shelving below.

Here is the before picture of my client's breakfast nook.  The original baker's rack is on the back wall with orange oak shelves.

Here is the before picture of my client's breakfast nook.  The original baker's rack is on the back wall with orange oak shelves.

Here is a close-up of the baker's rack before photo.

Here is a close-up of the baker's rack before photo.

The Process:

The process for the baker's rack makeover was pretty simple.  I thought I would share it with you today.  Here are the steps we followed:

First we set up the work space outdoors on a table in the yard.  We covered the table with a thick plastic sheet to protect it from any of the stripping product.  We used Citrus Strip paste, remover, rubber gloves, about 4 plastic bowls ( I suggest dollar tree for these) a package of very fine steel wool, a pkg of lint free white rags, white distilled vinegar, a mason jar, dark gray/black paint (we used SW Iron Ore), Minwax polyurethane sealant and some disposable paint brushes.  After we took the shelves and the wooden cabinet with drawers off of its iron support frame, we laid out all the pieces on our work table.  We emptied the Citrus strip paste in a plastic food container.  We brushed the citrus strip on all the pieces using our disposable chip brushes.  We made sure that a good amount of the paste was covering any place where the old stain needed to be removed.  

Next we let the paste sit for about 20 mins or so, (I recommend following the directions on the paste can). After the time was up, we used some of the very fine steel wool pads and with rubber gloves on hands rubbed all the pieces in the direction of the wood grain until the old stain was removed. We also used a metal spatula on a few spots that needed a little extra scraping.

(Once you begin to remove the old stain, it becomes pretty easy to see it lift off.)  With that step done we poured some of the Citrus strip wash remover liquid into another plastic container and generously brushed it all over the pieces.  The remover wash lifts up any remaining left over paste.  You just keep washing it on until the pieces of wood all seem paste free.

At this point, we let the pieces dry.  We let them dry over night, but you could just wait a few hours however long it takes for the piece to no longer be damp.  For our new stain, I suggested that we try a natural vinegar and steel stain that I had seen on Pinterest where you can age new wood.  You make this natural stain by filling a glass mason jar with a cup or two of vinegar and adding a piece of steel wool to the vinegar, then you let it set overnight.  The vinegar mixture will turn a brownish/grayish color.  The next time we met, my client had brushed all of our stripped pieces with the new vinegar steel mixture.  This left our pieces with a new brown stain that was more in our color tones, but still not quite the color we had in mind.  We wanted our pieces to have both a brown and a gray look to them and we wanted to be able to see the wood grain.

Sherwin Williams Iron Ore Paint color

Sherwin Williams Iron Ore Paint color

For our next step we purchased some gray paint from Sherwin Williams called Iron Ore. We put some paint about 2 cups in another plastic container. We thinned the paint slightly with a little bit of water, about three or four table spoons.  Next, we applied the gray paint and water mixture over our brownish stain and wiped the excess off with lint free rags. (This is a wipe off and on process. You don't want the water based mixture to sit on the wood in one place.)  We did one coat and loved the result.  My client wanted it a little darker look so we applied a second coat which gave it a more uniformed look.  Then we let all the pieces dry again.  

Side view of the baker's rack make over.

Side view of the baker's rack make over.

After the pieces dried, the final step was to apply a coat or two of clear satin polyurethane sealant to protect the pieces from any future water damage.  We used a Minwax poly top coat which was applied with a foam brush. We were also careful to make sure that our strokes when applying the top coat were even and continuous. This ensured that we didn't end up with any strange lines in the top coat finish. Once that was dry the pieces were re-assembled and placed back on the iron support.  The end result was a completely updated baker's rack.  The new baker's rack fits beautifully in my client's new kitchen.  

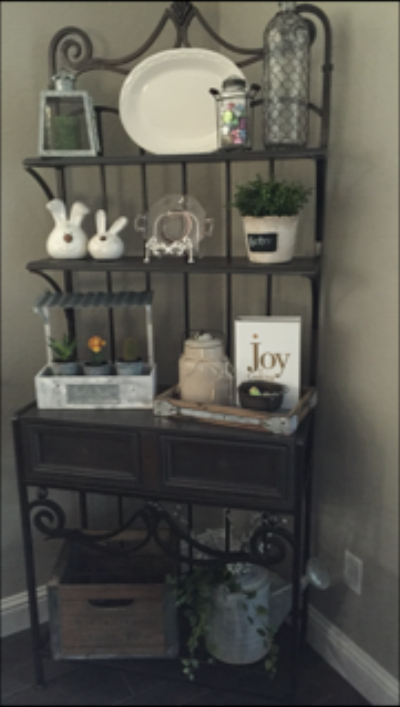
Sorry this pic is a little fuzzy, but you can get the idea of how the full make over came out.

Sorry this pic is a little fuzzy, but you can get the idea of how the full make over came out.

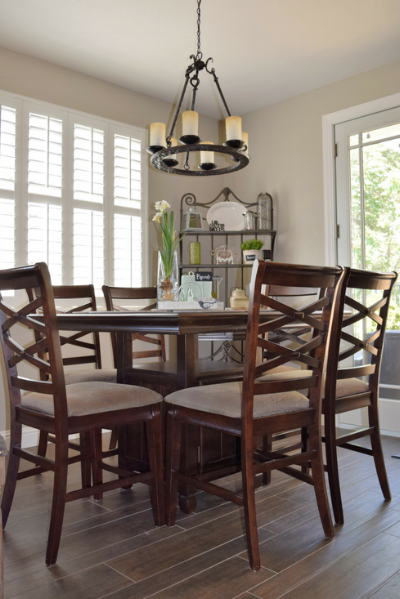
Here is the full shot of the remodeled breakfast nook.  You'll notice we moved the baker's rack at an angel, and the colors in the room were changed to reflect the client's taste and style.

Here is the full shot of the remodeled breakfast nook.  You'll notice we moved the baker's rack at an angel, and the colors in the room were changed to reflect the client's taste and style.

Take care,

Christina